Skeleton and Architecture for my React App Template

Picking up from the last post, I will be talking about the higher-level architecture of how I structure my React Applications. I package everything into one neat NPM package which you can use as a template with CRA. Just type run the command npx create-react-app my-app --template cra-template-xz.
This is the second post in the series, check out the first post here 👇

The Architectural Problem and Solution
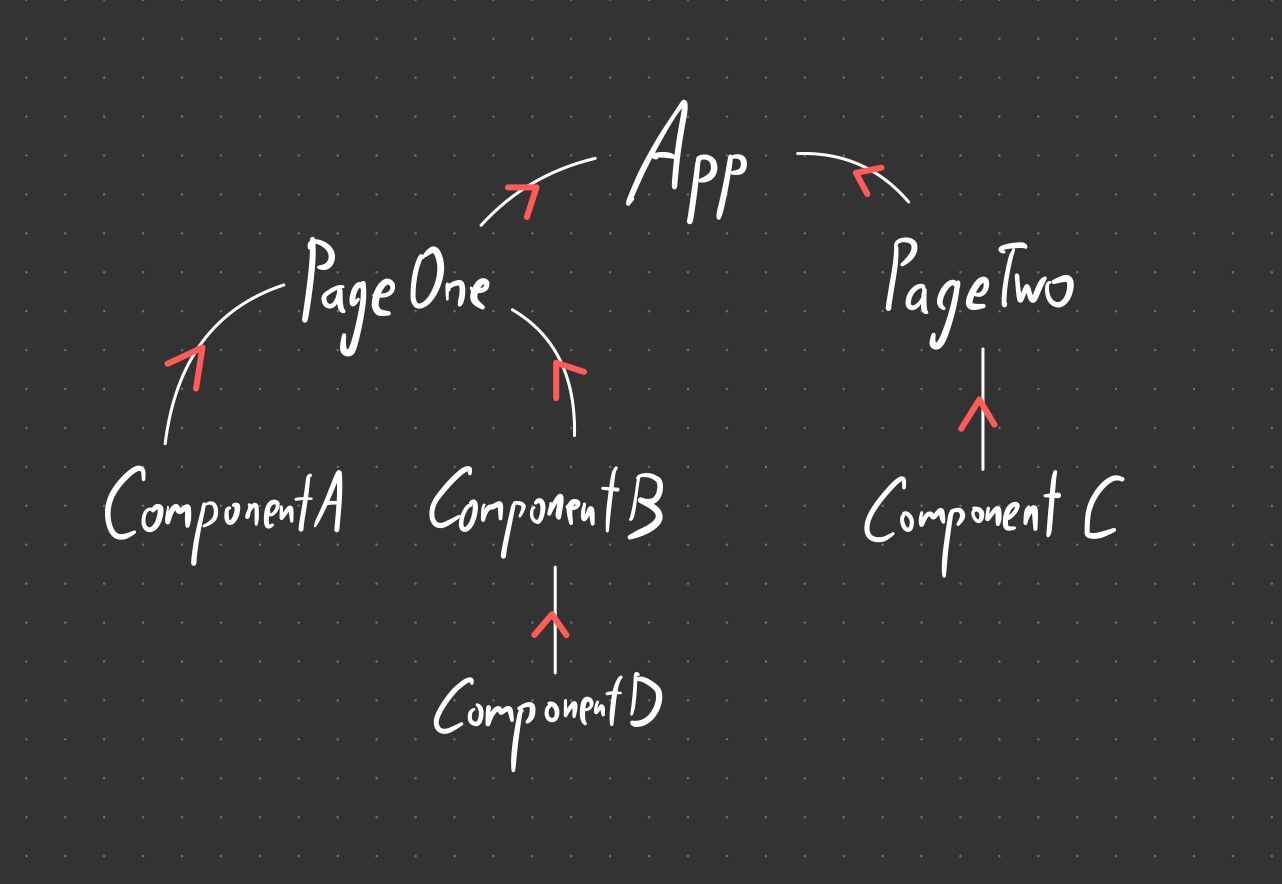
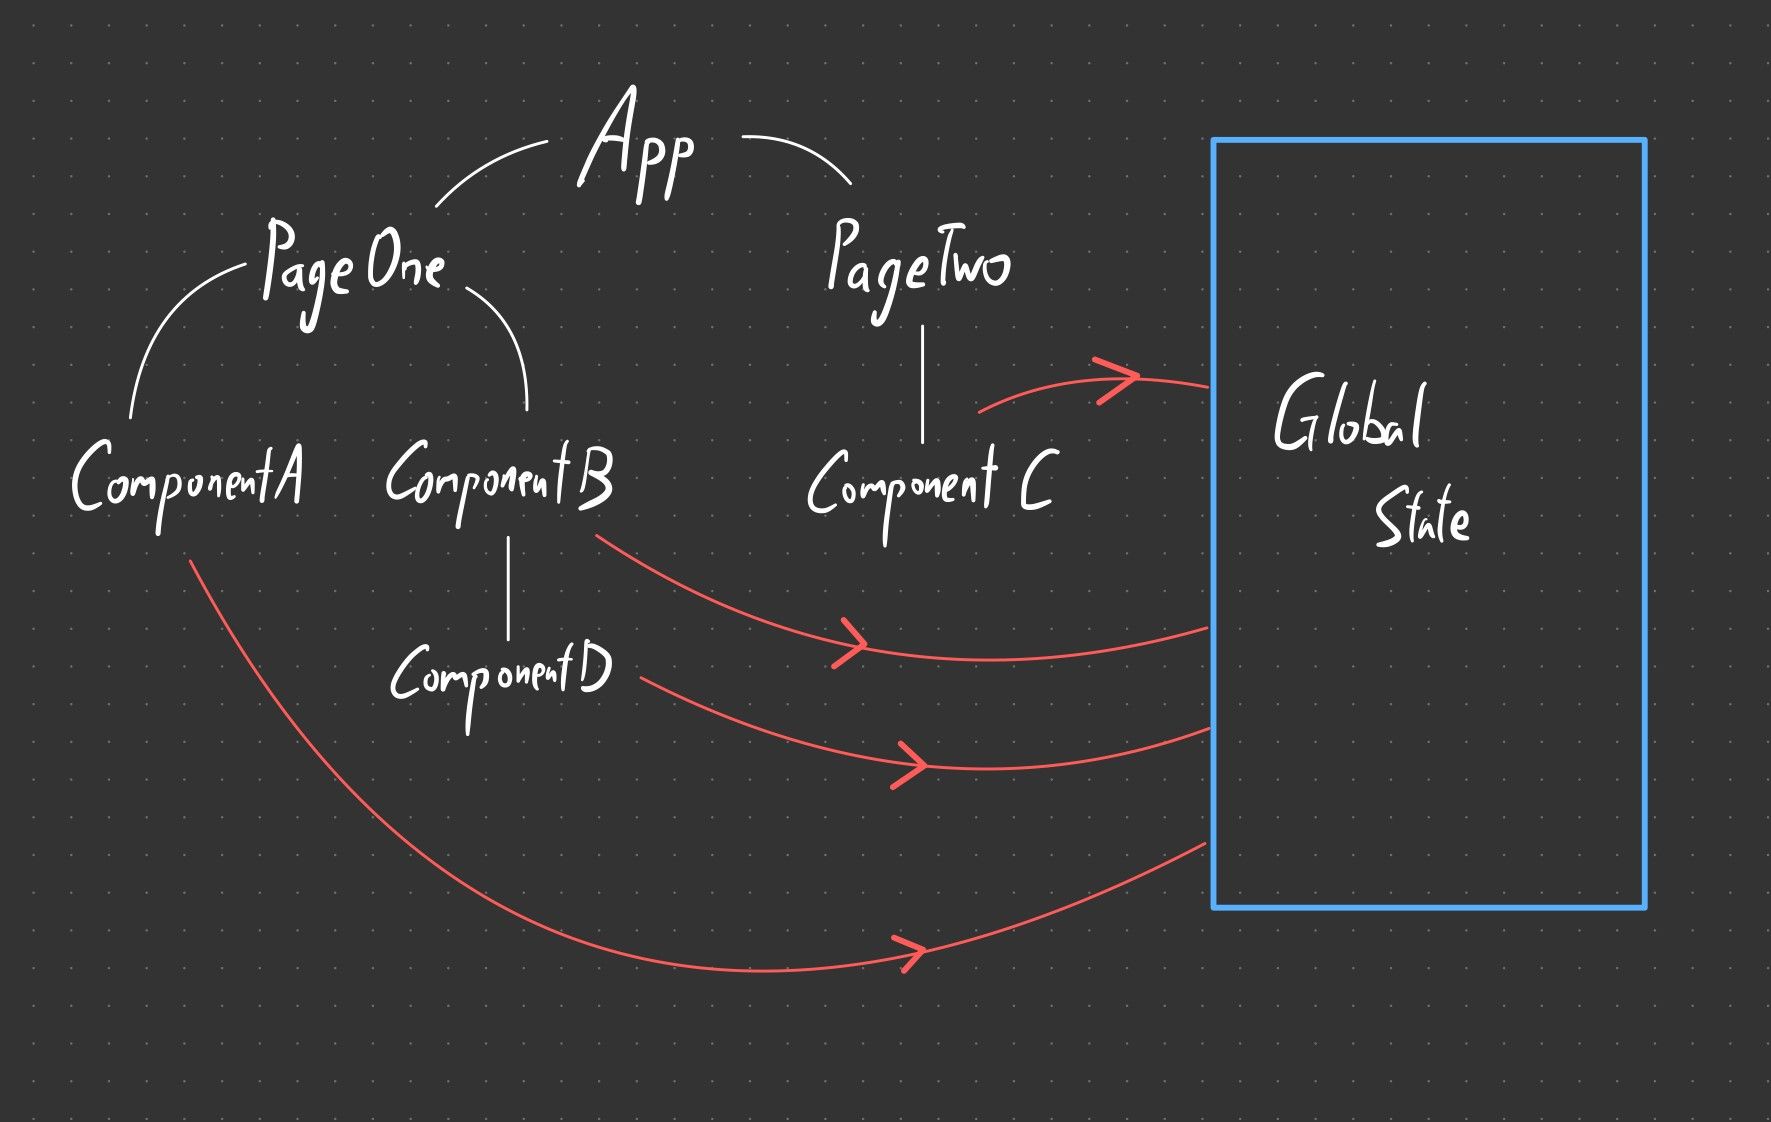
We learn about Props Passing within the first 15 minutes of doing any React quick start guide. Its simplicity allows us to craft complex components with composition, but it is difficult to create elegant applications with that communication model solely. To allow distant components to communicate with each other, we often use a global state like the Context API or Redux. This eliminates the inelegant solution of storing state all the way at the root of the component hierarchy tree and propagate it down to the individual components at the leaf of the tree. This approach also allows individual components to read/write to the shared global state with the Flux model.
Now, there are some apparent shortcomings with this approach despite its merits. Each component's state is now kinda bound to the global state. Potentially, we might have to normalize the desired piece of state at each component before consuming it. Since all data is fetched internally within the individual components, I find it harder to visualize where the data is coming from, its structure and potentially causing it to be more difficult when debugging.
I smashed both approaches together to overcome the shortcomings of both solutions, splitting the components into 2 ideological categories, Page Components and UI Components.
Pages will act as templates. I can set the router to access these pages. I can set standardize things like the document title (the browser tab name). I can apply styles. I can change the page header in the document with just a prop. But most importantly, I can conduct all global state-related logic in my Page Components. I can access the global state, normalize the data before prop passing it down to my UI Components, I have one standardize place to dispatch global state actions.
UI Components act as self-contained React components. You can think of them as widgets or typical React components. They accept data through props and modify application data through state lifting onto its parent Page Component.
Look at Graph 📈
That's a pewdiepie reference incase you didn't get it. Anyways~
These are the 2 approaches, props passing and using global state on individual components.
And this is the communication model of the solution I adopted.
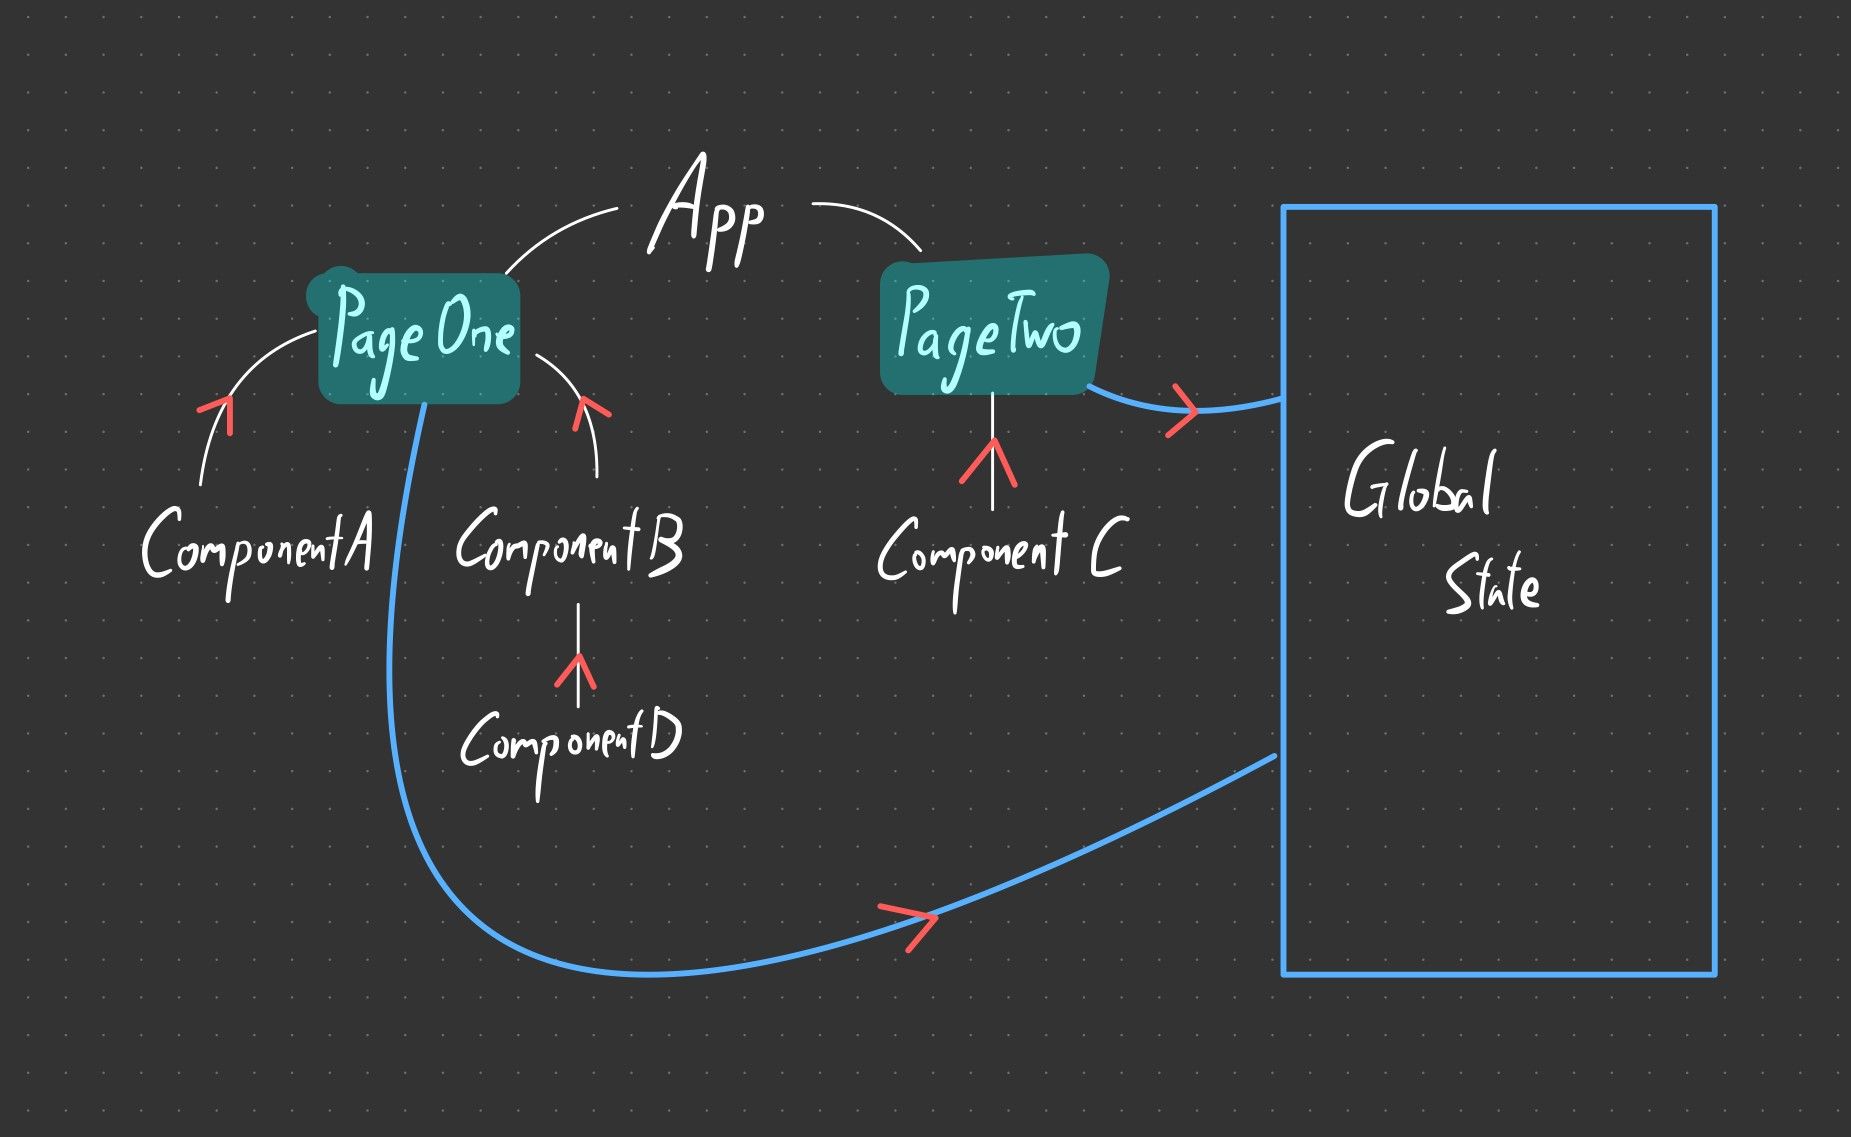
This abstraction retains the ability to write complex composition components while reducing the complexity of having to consider the global state at every single individual component.
However, this is not the perfect solution. It is great for small or medium size applications where the component tree is pretty shallow. For larger applications with a deep component hierarchy, we will (once again) run into the problem of props passing through too many layers. Since I am a student and I routinely work with applications that are not too huge in my personal time and with school work, this architecture works perfectly fine for me (at the moment).
This is the truncated folder structure.
my-app
├───public
└───src
    │   index.tsx
    ├───App
    │       App.tsx
    │       tabConfig.tsx
    ├───components
    │   │   index.tsx
    │   ├───Counter
    │   │       Counter.less
    │   │       Counter.tsx
    │   ├───Layout
    │   │       Layout.less
    │   │       Layout.tsx
    │   └───MySubMenu
    │           MySubMenu.tsx
    ├───pages
    │   │   index.tsx
    │   │   Template.less
    │   │   Template.tsx
    │   ├───CounterDemoPage
    │   │       CounterDemoPage.tsx
    │   └───DemoPage
    │           DemoPage.tsx
└───reduxFin
In the next post, I will go into specifics about the implementation of this architecture. I will probably also talk about how I implemented many parts of my CRA template, what quality-of-life features I have added to it and stuff.
If you want to try out the template today, you can run npx create-react-app my-app --template cra-template-xz or visit the npmjs page: